

You will learn how to deploy Cisco Secure Client VPN using Intune. This is a step-by-step guide on deploying Cisco Secure Client, previously known as Cisco AnyConnect from Intune to your managed Windows devices.
Microsoft Intune is a cloud-based endpoint management solution. It manages user access to organizational resources and simplifies app and device management across your many devices, including mobile devices, desktop computers, and virtual endpoints.
Win32 app management in Intune allows you to install, configure, protect, and monitor your Windows applications on devices at your organization. Win32 apps are deployed using the Intune management extension (IME), which is installed automatically when a PowerShell script or a Win32 app is assigned to the user or device using Intune.
The first step is to prepare the downloaded Cisco Secure Client installer file for automatic installation. Then, you can add the app to Intune after preparing an Intunewin file to be uploaded using the Microsoft Win32 Content Prep Tool.
Prepare Installer Files for Cisco Secure Client
You can download the Cisco Secure Client by searching the Cisco official center page or collect the installer files with the help of your organization’s respective team.
Follow Cisco documentation to prepare the profiles or files you need for your environment. Depending on your needs, your folder structure should look like this if you are attempting to install multiple files or profiles with a single installer.
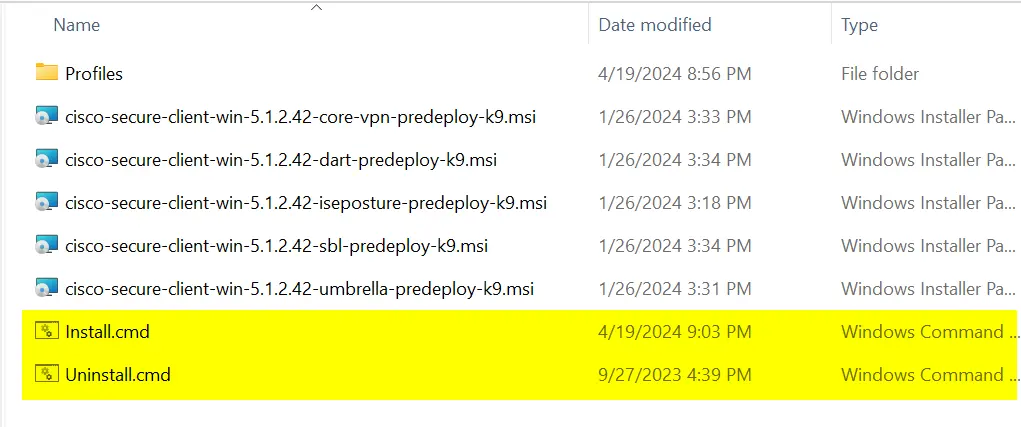
You must have a batch or powershell file ready to deploy with Intune. In this example, we will deploy the batch file “Install.cmd” which installs Cisco VPN client on targeted Windows devices.
The below script installed all required Cisco modules and copied the required configuration files (.XML) to the installation directory on Windows devices. Copy and paste the code below into Notepad, and save the file as Install.cmd.
Important – As the requirements or needed files might not be the same for your environment, we recommend initiating a manual test before proceeding with Intune deployment.
@echo off

msiexec.exe /i "%~dp0cisco-secure-client-win-5.1.2.42-core-vpn-predeploy-k9.msi" LOCKDOWN=1 ALLUSERS=1 REBOOT=ReallySuppress /QN /l*v "%SystemRoot%\Logs\anyconnect-win-5.1.2.42-core-vpn-predeploy-k9.log"
msiexec.exe /i "%~dp0cisco-secure-client-win-5.1.2.42-dart-predeploy-k9.msi" LOCKDOWN=1 ALLUSERS=1 REBOOT=ReallySuppress /QN /l*v "%SystemRoot%\Logs\anyconnect-win-5.1.2.42-dart-predeploy-k9.log"
msiexec.exe /i "%~dp0cisco-secure-client-win-5.1.2.42-sbl-predeploy-k9.msi" LOCKDOWN=1 ALLUSERS=1 REBOOT=ReallySuppress /QN LOCKDOWN=1 ALLUSERS=1 REBOOT=ReallySuppress /QN /l*v "%SystemRoot%\Logs\anyconnect-win-5.1.2.42-sbl-predeploy-k9.log"
msiexec.exe /i "%~dp0cisco-secure-client-win-5.1.2.42-iseposture-predeploy-k9.msi" LOCKDOWN=1 ALLUSERS=1 REBOOT=ReallySuppress /QN /l*v "%SystemRoot%\Logs\anyconnect-win-5.1.2.42-posture-predeploy-k9.log"
msiexec.exe /i "%~dp0cisco-secure-client-win-5.1.2.42-umbrella-predeploy-k9.msi" LOCKDOWN=1 ALLUSERS=1 REBOOT=ReallySuppress /QN /l*v "%SystemRoot%\Logs\anyconnect-win-5.1.2.42-umbrella-predeploy-k9.log"
copy /y "%~dp0VPNConfiguration.xml" "%ProgramData%\Cisco\Cisco AnyConnect Secure Mobility Client\Profile"
copy /y "%~dp0AnyConnectProfile.xsd" "%ProgramData%\Cisco\Cisco AnyConnect Secure Mobility Client\Profile"
copy /y "%~dp0ISEPostureCFG.xml" "%ProgramData%\Cisco\Cisco AnyConnect Secure Mobility Client\ISE Posture"
Convert EXE to INTUNEWIN File
You can download the Microsoft Win32 Content Prep Tool from GitHub as a .zip file. The zipped file contains a folder named Microsoft-Win32-Content-Prep-Tool-master. The tool converts application installation files into the .intunewin format.
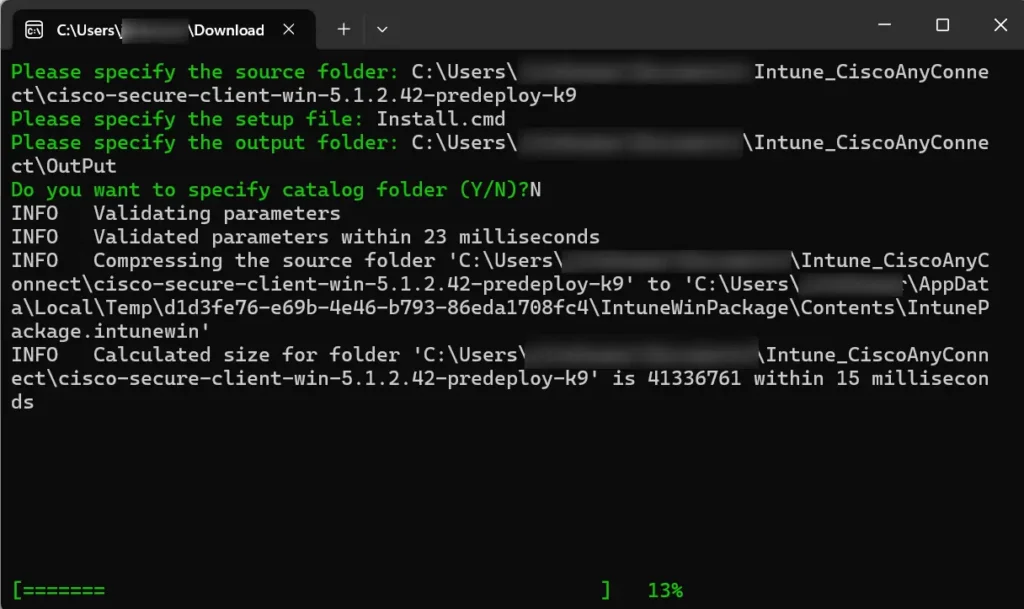
Launch the Win32 Content Prep Tool in the device and locate the folder where the Cisco setup files are present. Then, specify the source folder, setup file, and output folder, which will appear as shown below.
- Please specify the source folder – Enter the folder that contains cisco setup files.
- Please specify the setup file – Enter the setup file for your Cisco installation (for example, Install.cmd).
- Specify the output folder – The Win32 Content prep tool will generate .intunewin file in the folder.
- Do you want to specify catalog folder – Type N.
Steps for Deploying Cisco Secure Client VPN using Intune
The next step is to upload the converted Intunewin file for Cisco Secure Client deployment. The following steps will help you add a Windows app to Intune Admin Center.
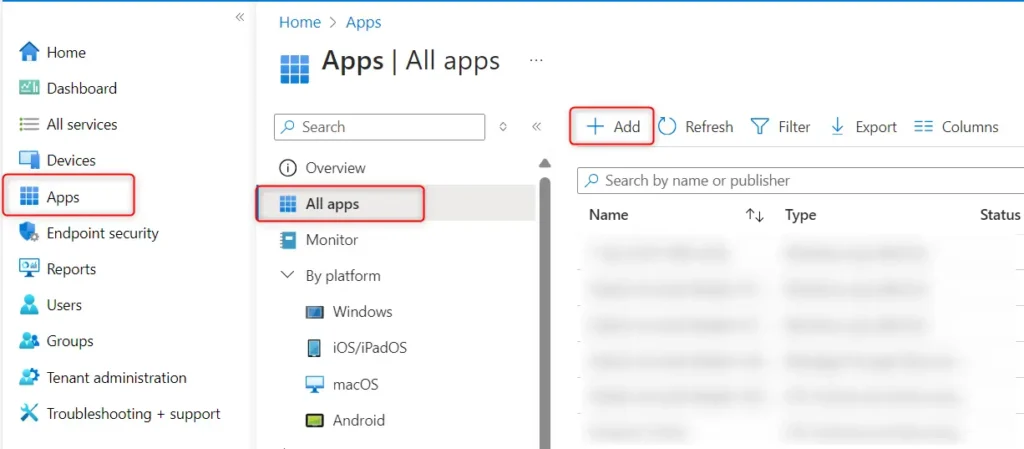
- Sign in to the Microsoft Intune admin center.
- Select Apps > All apps > Add.
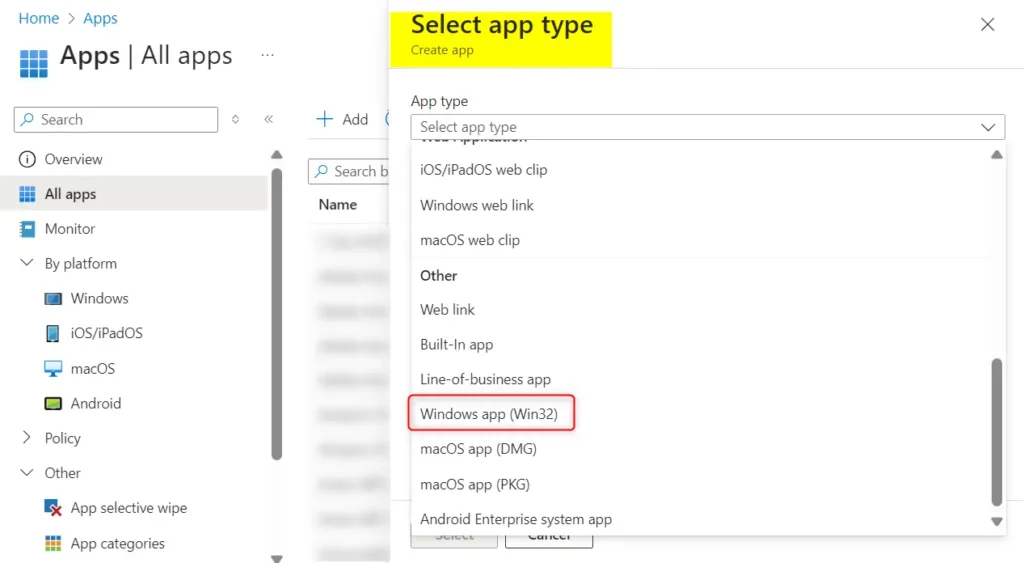
On the Select app type pane, under the Other app types, select Windows app (Win32).
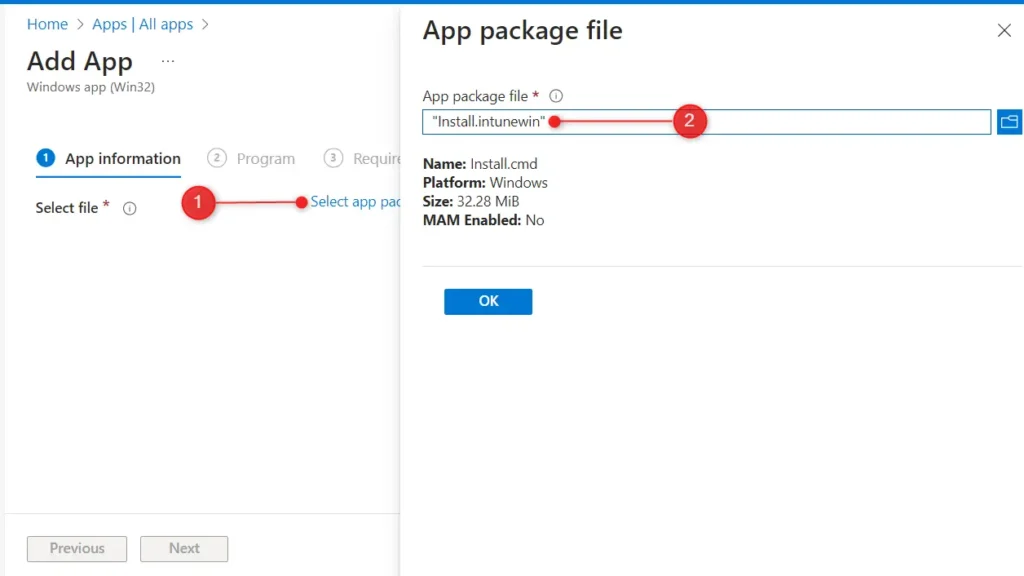
On the Add app pane, click Select app package file to select the created “Intunewin” file.
- On the App package file pane, select the browse button. Then, select a Cisco installation file. Once you locate the file, the app details appear.
- When you are finished, select OK on the App package file pane.
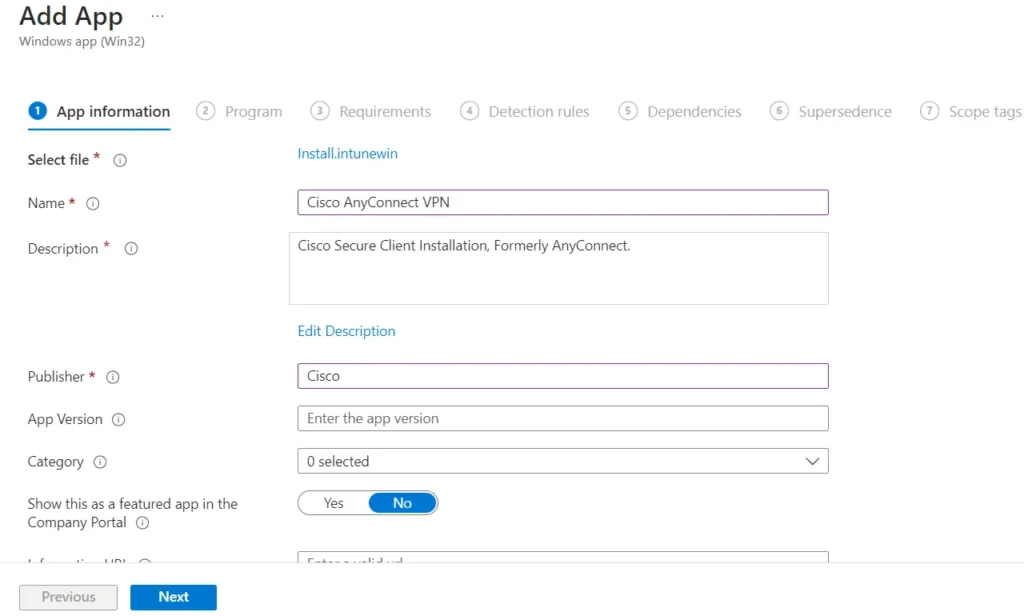
In the App information tab, you can specify the program name, description, publisher information, app version, and logo for the app. Once you have specified the details, click Next.
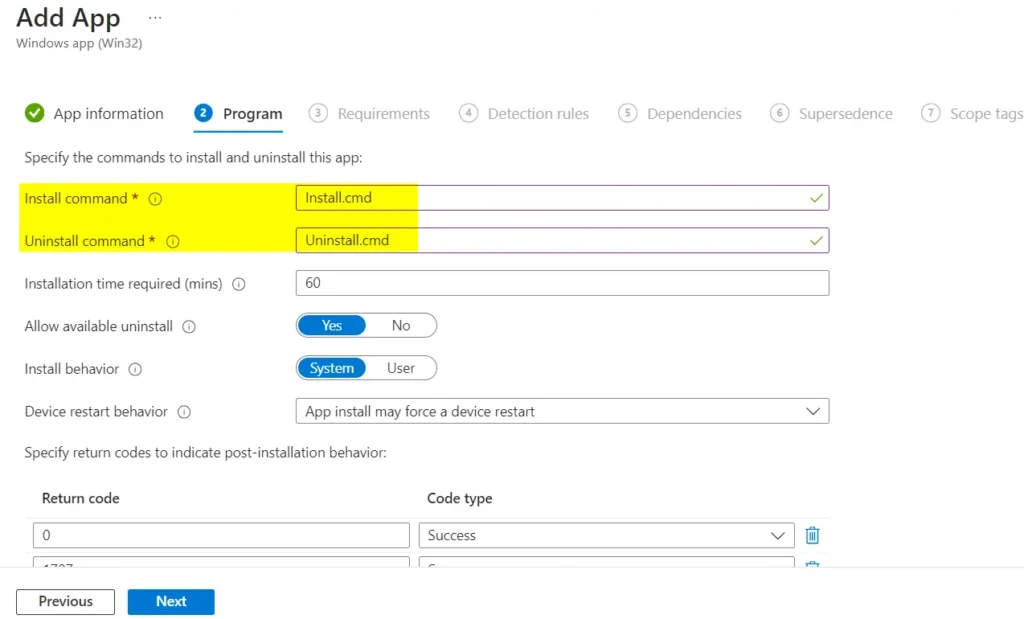
On the Program page, configure the app installation and removal commands for the app, and click Next.
- Install command: Add the complete installation command line to install the Cisco Secure Client.
- Uninstall command: Add the complete command line to uninstall the Cisco app.
- Installation time required: The number of minutes the system will wait for the installation program to finish. The default value is 60 minutes. If the app takes longer to install than the set installation time, the system will fail the installation. The max timeout value is 1440 minutes (1 day).
- Allow available uninstall: Select Yes to provide the uninstall option for this app for users from the Company Portal. Select No to prevent users from uninstalling the app from the Company Portal.
- Install behavior: Set the install behavior to either System or User.
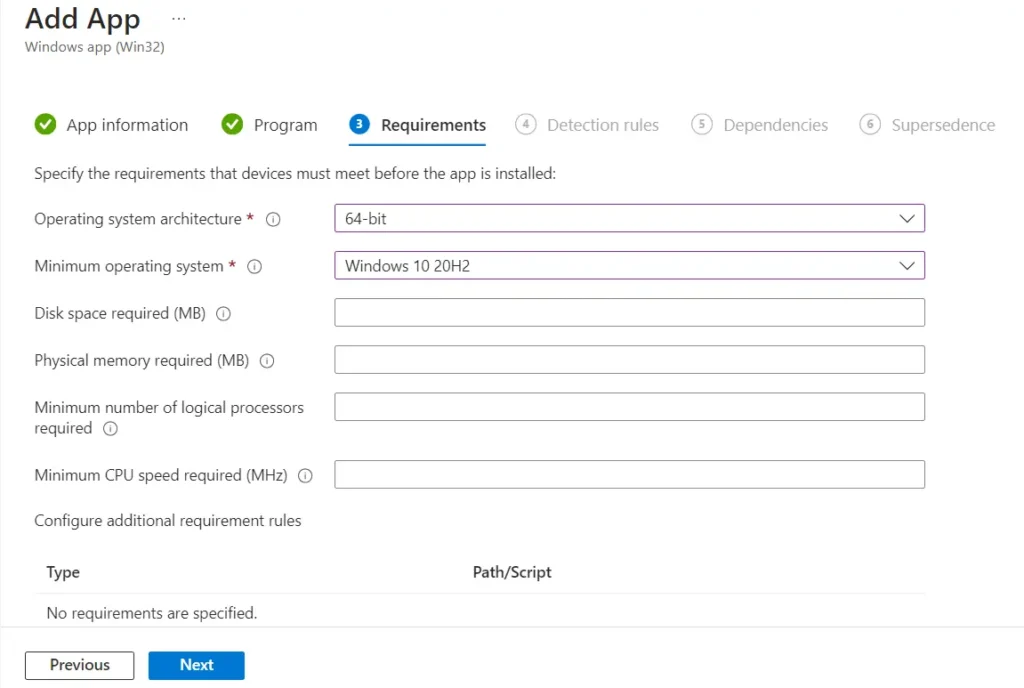
On the Requirements page, specify the requirements that devices must meet before the app is installed. The entries below are mandatory; you may skip other fields.
- Operating system architecture: Choose the architectures needed to install the app.
- Minimum operating system: Select the minimum operating system needed to install the app.
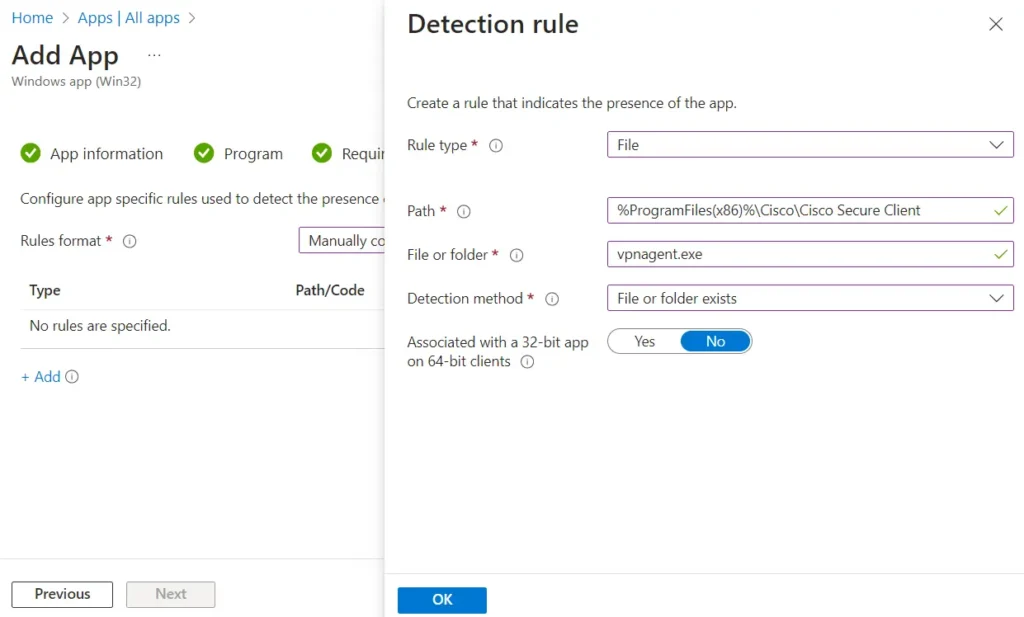
On the Detection rules pane, configure the rules to detect the presence of the app. You can choose to add multiple rules, but you must choose at least one detection rule.
Here I selected to Manually configure detection rules to verify based on file or folder detection, and clicked OK to save.
On the next few screens, you are prompted to select Software dependencies, which are applications that must be installed before this application can be installed and Supersede, You can specify which apps will be directly updated or replaced when you supersede an application. To update an app, disable the uninstall previous version option.
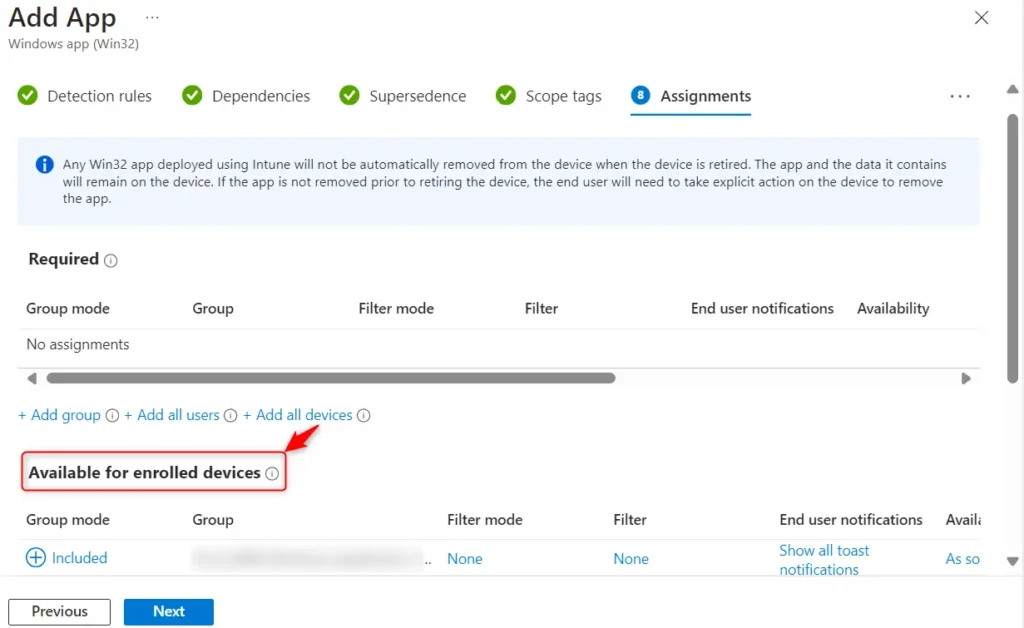
I directly jumped to the Assignments section, as previous fields were not configurable for now. You can select the Required, Available for enrolled devices or Uninstall group assignments for the app here.
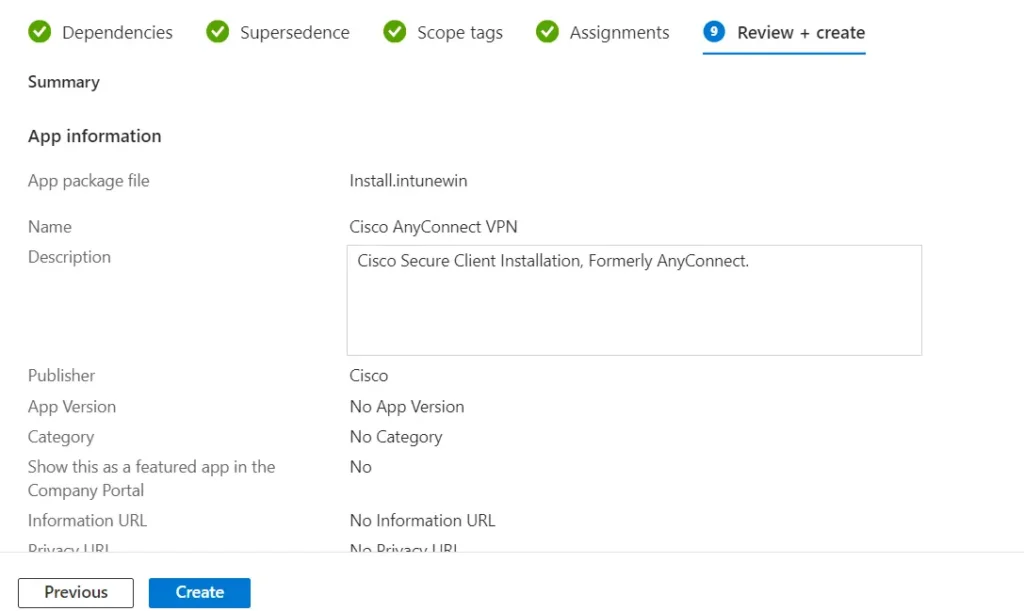
Review the values and settings you specified for the app and verify that you configured the app information correctly. Once you click on Create, the app will be created, and the required added files will start uploading to the Intune library, which will take a few minutes, depending on the size of the application.
Once the Win32 app is created in Intune, you should receive a notification that it has been created successfully. Refresh the Intune admin center, and you should find the Cisco AnyConnect VPN under All Apps or Windows Apps section.
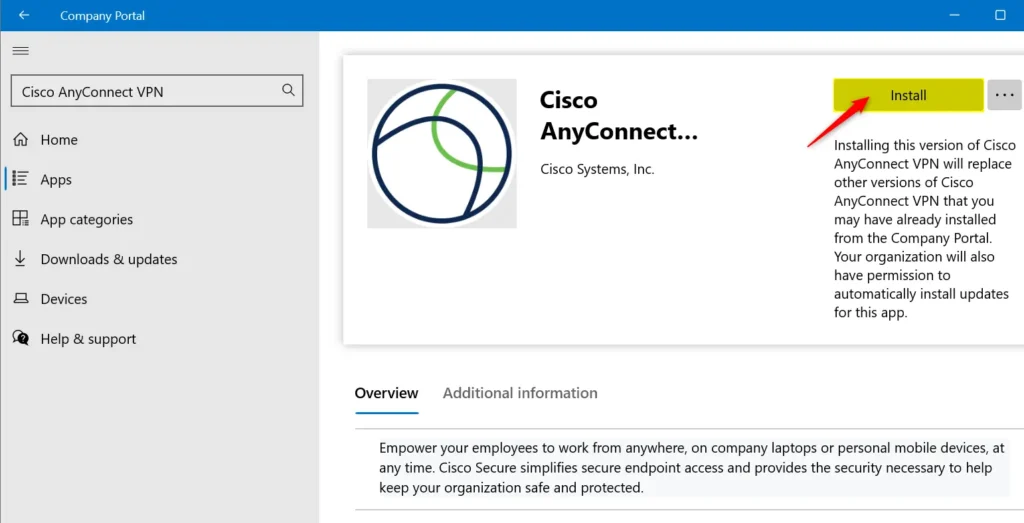
Cisco Secure Client VPN Installation
We deployed the Cisco AnyConnect VPN, which is available for installation in the company portal. End-users can now install the app by simply clicking the Install button and waiting for the installation to finish.
When an installation issue occurs with a Win32 app, logs on the client machine are commonly in C:\ProgramData\Microsoft\IntuneManagementExtension\Logs to review the details.

Thanks in support of sharing such a fastidious opinion, article is nice,
thats why i have read it entirely
Thank you for reading my blog post.
The 5.1.7 installer doesn’t have any install or uninstall cmd files included. Besides this is there any way to just install the VPN client only (so no other parts of the Cisco modules). I also miss some details about where to put the config file in the install bundle for copy to the right location in windows…
Thank you for the feedback, I will check the details you have written about and update.
I’m extremely impressed along with your writing skills and also with the layout in your weblog.
Is this a paid topic or did you modify it your self?
Anyway stay up the nice high quality writing, it’s rare to see a nice weblog like this one nowadays.
Instagram Auto follow!
Hi HeyGen,
Thank you for writing back and the compliment. Sorry because it is a delayed revert.
Not a paid topic, the article is a reflection of my own technical experience aligned with my day to day work responsibilities.
Regards
Dhanraj
Its like you read my mind! You appear to grasp a lot approximately this,
such as you wrote the book in it or something.
I believe that you could do with a few percent to power the message home a
little bit, but instead of that, that is great blog. An excellent read.
I’ll certainly be back.
Thank you for your valuable suggestion and feedback.